 If you’ve ever been a guest here, you know that I am a crafter with a passion for rubber stamping. It’s an art form that doesn’t require any real talent, just an eye for detail and a willingness to get covered in ink from time to time. I got hooked on stamping quite a few years ago when I was looking for a creative outlet to while away the long winters of North Conway, NH where we had our first inn. I stumbled upon an adult education course offered by a Stampin’ Up rep and signed up with a “nothing ventured, nothing gained” attitude.
By the end of the first class I was totally obsessed with creating unique and beautiful cards with just some rubber stamps and an ink pad. Of course, after each succeeding class I found myself lusting over all the tools and accessories I could invest in to feed my stamping habit. My instructor/Stampin’ Up rep hit the mother lode with me, and I soon found myself loaded to the gills with stamping paraphernalia.
Over the years, I have expanded my repertoire of stamping techniques to include stamping on velvet with a heat technique, creating my own stamp to “wallpaper” my powder room in a leaf pattern, and my latest venture: stamping on tiles!
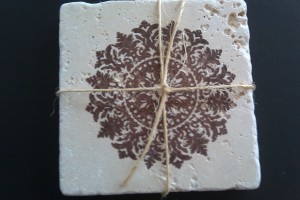
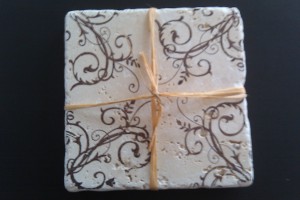
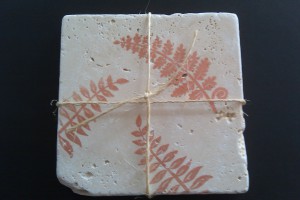
My housekeeper, a crafter in her own right, and I researched the process online and decided to give it a whirl one afternoon. The process was relatively simple and resulted in dozens of beautifully designed tile coasters and trivets that took us under three (3) hours to make in my kitchen. We were so pleased with the results, we’ve decided to sell them in my little gift cupboard at the Inn. We’re convinced that they will make great gifts for our guests to bring home with them.
Here’s all you need to create beautiful stamped tiles in your own home:
- Rubber stamps
- Solvent inks, like Brilliance or Staz On, in a variety of colors
- Stamp cleaner made especially for solvent inks
- Porous tiles, like tumbled stone or marble
Step-by-Step Instructions:
- Play around with designs on paper first. We found that larger stamps and background stamps worked well for us.
- Ink the stamp with solvent ink and place it face down on the tile. Press firmly.
- Remove the stamp and clean with solvent ink cleaner immediately to protect your stamps. (You may want to use the same stamp on several tiles before cleaning).
- Place the stamped tiles right side up on a baking sheet that has been covered with parchment (to protect grease from the pan leaching onto the porous tile).
- Place the baking sheet into a pre-heated 350° F oven and bake for 15 minutes. This step will heat set the ink. *
- Remove the tiles from the oven and let them cool to the touch on a wire rack.
- Once the tiles are cool, attached self-adhesive felt pads to the bottom of each one to prevent scratching wood surfaces.

That’s all there is to it. So go ahead and experiment. Have fun in your kitchen with stamps and tile. We did.
 [Note * If your design calls for a background stamp in one color and a second stamp in another color on top of it, be sure to heat set the first color before stamping the second color over it, or you will find that the colors bleed. Bake a second time to heat set the second color.]


